Wednesday, June 5, 2019

The Quest For Alternative Learning Experiences

Our school (Tuckerton Elementary School) has been dabbling in Virtual Reality and Augmented Reality experiences for the last few years. From smaller experiences like Google Cardboard and Merge Cube to apps like ZooKazam, Street View, and Quiver. I wanted to get more information before I jumped into this so I sat down with our STEAM teacher Nick Barbieri last year to discuss the planned usage and how he saw it fitting in with his lessons. We then had a discussion with our Superintendent about possibly adding a dedicated VR headset to our repertoire. Thankfully, I work in an environment where our administration sees the benefit in taking risks with new technology to allow our students these amazing learning opportunities. After our initial discussions I wanted to include Nick on a Skype with Jamie Donally who is a leader in AR/VR use in the classroom. We had a great discussion and it was very beneficial to hear from someone already using the technology in the classroom. She gave us some tips and ideas on how best to move forward. We discussed the cost vs effectiveness which was a very important factor. My initial plan was to transform part of our computer lab to have one VR station at each lab table but I was concerned about the space needed. In a traditional VR setup, you need a pretty powerful graphics card in a computer which can drive costs up quite a bit over your standard lab computer. There was also the cameras that needed to be mounted in order to track the movements of the user. In the end, I decided the technology wasn't quite there yet for our needs and space available. The Oculus Go had just come out which was a stand alone unit not needing a PC and was truly wireless. However, after researching that device it was too under powered for what I wanted out of a VR device. A new Oculus unit had been announced but wasn't coming out until Spring 2019. We pre-ordered the new Oculus Quest and the waiting game continued.

Oculus Quest

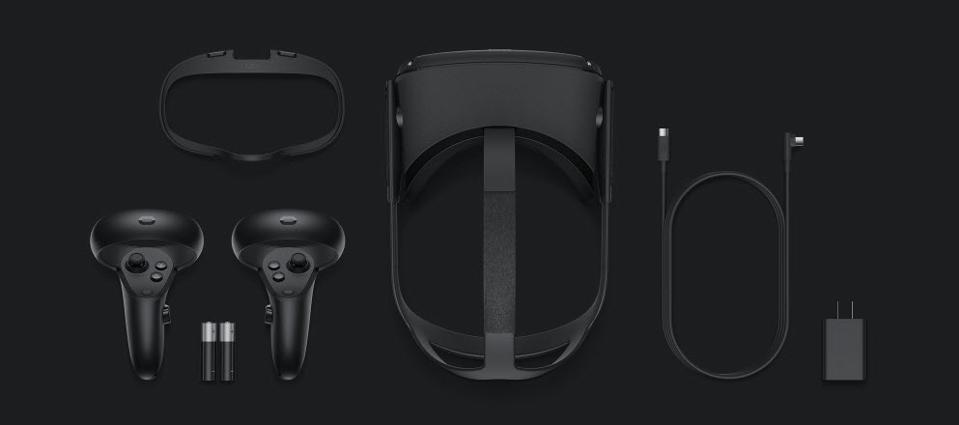
The Oculus Quest is a standalone VR headset meaning it does not need to be physically connected to a computer. The headset comes with two touch controllers, batteries, a spacer for those with glasses and a USB-C based charger.
Image result for oculus quest
Credit: Oculus
The Quest features four cameras on the outer edge on both the top and bottom of the front side. Underneath the Quest there are a volume adjustment and a lens adjustment to help with visual acuity. The left side includes the USB-C charging port and finally on the right side is the power button. The Quest has three velcro adjustments to help give a snug fit for anyone. There are two on the side and one on the top. The tighter the fit, the better the immersion and helps eliminate and outside light leaking in.

Setup

The Quest arrived at our school on May 22nd. It was like Christmas morning! I was super excited to unbox it and give it a test spin. However, as always there were some hiccups. After setting up the Quest via the Oculus app on my phone (a requirement), I ran into issues with the initial software download. Somewhere somehow the software update was being blocked. I had to monitor our network traffic from the device to see where it was requesting but I saw nothing being blocked. I was unfortunately not able to resolve the issue and the only way I was able to push past this first download was to tether the Quest to my phone. The download took about 45 minutes via my phone but will obviously be a lot less on wifi. Once it was finished I setup a school based Oculus account. When you put on the Quest for the first time, you are greeted with the Guardian screen.

The Oculus Insight System allows tracking of both the player and environment.
There are four cameras mounted on the exterior of the Quest which track both player movements and the environment in which you play. When you first start up the Quest, it will ask you to setup your play space. There are two controllers included with the Oculus that help you choose options and interact with your VR space.
Image result for oculus quest controllers
One of the two included Oculus Touch Controllers.
You will confirm where the floor is and also "trace" and outline on your floor that shows where you have free space. That's right you can "see" your room during setup with the use of the exterior cameras. This helps you draw around the floor and see objects to avoid like couches, desks, chairs, etc. When you get too close to the edge of your mapped out play area, a Tron-like grid will appear in your view to let you know you are close to the edge. If you breach this "wall" the external cameras will activate and all activity within the Quest will stop allowing you to see the room again. Step back into the grid and your app will immediately return. It's an ingenious design and really takes the worry about safety away. Now this will not stop you from swinging your arms and crashing your controller into a wall (as I have done)! When drawing your play area be sure to take into effect the length of your arms extending past the grid. The recommended play area is 6.5' x 6.5' but you can play with less.

A portion of the Quest setup safety video.

Once your Oculus is setup you're ready! The Oculus Quest includes a few game demos to try out but must be installed first. This brings me to another descision, which size is right for you? The Quest comes in 2 sizes, 64GB ($399) or 128GB ($499). That is the only difference between the two Quest options. Not knowing what to expect, we went with the larger 128GB version as there is no option for any memory expansion through SD cards. I loaded up demos for Creed Boxing and Beat Saber. I wanted to purchase some apps but we weren't ready just yet (more on that in a bit). I did not try out Creed Boxing but Nick did and said it was a pretty incredible experience. I opted to try out Beat Saber and it has become somewhat of a phenomenon here. 

Beat Saber reminds me a little bit of Guitar Hero meets Star Wars in that you must time your block breaks as they come at you. Each hand is holding a saber. The left hand has a red saber and the right hand has a blue saber. When you begin you start in a grid-like environment. Once the music begins two blocks (one red and one blue) come at you with small white arrows in each block. These arrows represent the direction in which you must slash your sabers to break the blocks. You must also slash the blocks with the correct color (hand). The closer you are to slashing the center of the block and also with an initial angle of 90 degrees the higher your score. You also get extra points if you continue your slash arc 60 degrees after the initial slash. For more on the scoring take a look at Beat Saber's official video here. I have included a video of one of my first few attempts at Beat Saber to give a better idea on what it looks like for the player. I've learned a lot more about how to get a higher score since this video. I can see this as a great indoor recess or PE activity. This app is a fantastic way to capture attention of those who are hesitant or feel they might get sick in VR. I've hooked a few people who were hesitant or consider themselves non-gamers.


Classroom Usage

Last week I took vacation days and so I decided to bring the Quest home with me. I was able to really spend some time with it and better understand some of the nuances and think about how students would react to using it. I was able to test out long term play and how that would affect a typical class period. One of the apps that I was most eager to try out was Apollo 11 VR Quest. This is a fully immersive experience and will be perfect for our students to learn about the 50th anniversary of the landing. Each section of the app is broken up like chapters in a movie where you can jump to different points. I immediately loaded up the launch. After waiting a short time for it to load, I was immediately sitting to the left of Neil Armstrong and Michael Collins. It was truly a awe inducing moment. I could look around the capsule as communications from the Cape came in over my headset. All the communications between the crew and mission control were timed such that the animated astronauts next to me would move their mouths in time to their actual communications. I was able to look out the window and see the curvature of the Earth once we broke through the atmosphere and the astronauts rumbled in their seats from the rough ride of the Saturn V rocket. All the gauges in front of me were running in real time and I was able to view speed, distance, and roll in realtime. It's one thing to read or watch a video of these types of events but to be truly immersed in it as it is happening was absolutely amazing. 


The next chapter I jumped into was the actual landing on the moon. Once that chapter loaded, I was inside the lunar module with Neil Armstrong. Again, looking around the module was breathtaking as I was truly able to understand just how cramped it was and what these astronauts had to endure. Once again, all the gauges and alarms (yes they did encounter master alarms during landing) all react in real time. You are also able to listen to all the transmissions as they happened between Armstrong and Houston control. Looking out the window you can see the lunar surface get ever closer as you're able to start your descent. Once you get close enough, lunar dust actually starts to kick up until finally you're down. You truly feel pride over what they accomplished once you hear, "The Eagle has landed!" Mr. Barbieri has already started the unit lesson on the Apollo program with 5th and 6th grades in order to prep them for their VR experience next week. I cannot wait to see and hear the student reactions when they first experience this. You can see the lunar landing experience yourself in this video I captured.

 
I want to be able to include as many subjects as possible since this device costs what it does. Another app we just purchased yesterday is Tilt Brush. While we haven't had too much time with this app, our art teacher is teaming with ideas and was blown away during her demo time yesterday. 
 
Image result for tilt brush

The Oculus Quest app store is still very much in its infancy having only opened 2 weeks ago. I really look forward to seeing what's available for our new school year in the fall once developers have had time to port some of their apps from the dedicated Rift headset to the Quest given some time.

One of the other reasons I took the Quest home was to test it out on my 2nd grade son. I wanted to see how he'd react, how did the headset physically fit on him, would his glasses hinder his experience, etc. I did put in the eyeglass spacer but found that he actually didn't need it. By adjusting the velcro straps it was fine enough for him. He wasn't as blown away by Apollo 11 as I was, and he also got a little scared on one chapter where it does a full scale fly around of the Saturn V rocket. He did very well in Beat Saber and really enjoyed that one. All in all it was a good experience but keep these things in mind depending on the age of your students. 

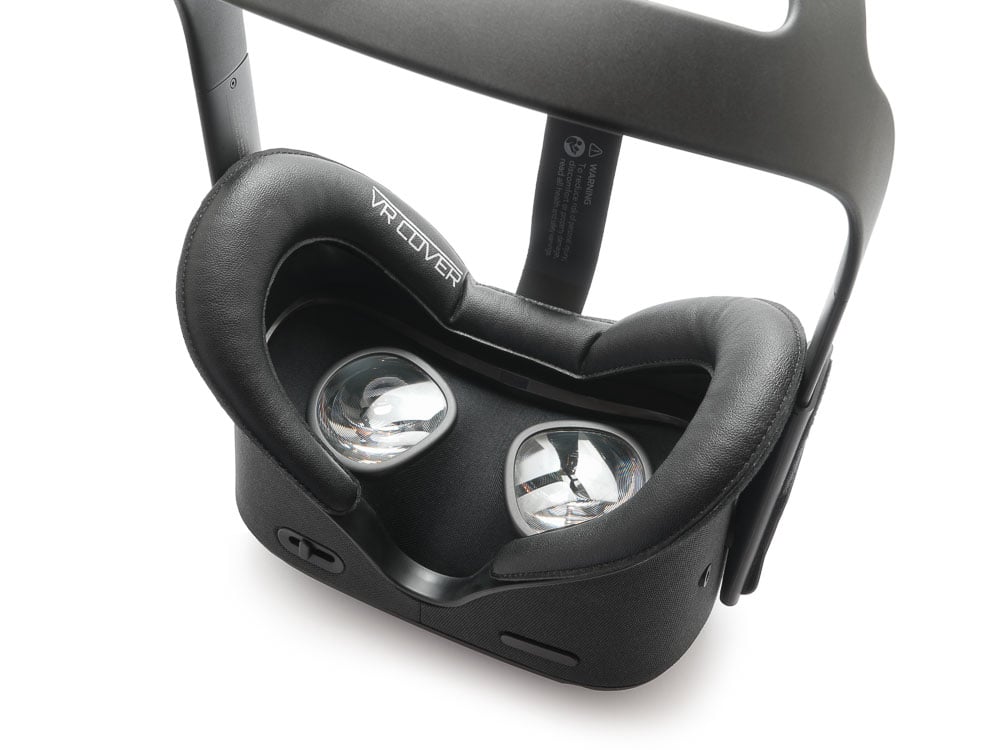
One accessory that I would suggest purchasing is the Oculus Cover. This item will allow for easier cleaning and prevent any hygiene issues. A simple wipe down with a antibacterial wipe between uses will help prevent any issues.

Oculus Quest Foam and Interface Basic Set

Purchasing Apps

One of the aspects about the Oculus environment I want to point out especially for education is how to purchase apps. In New Jersey, we're only really allowed to purchase anything via a Purchase Order. Oculus does NOT support any purchase orders so it was a real challenge to find a proper solution to purchase apps for the Quest. What we found (for now) is that we have to purchase a Visa gift card from any of our normal vendors (via purchase order) then use that card in the app store. I hope to be able to open a dialog with Oculus to see if there is a more educational friendly way to streamline purchases and possibly add a way for us to setup a private app store where managers can pre-approve apps for use. I see so many usage opportunities in education and I hope Oculus is open to helping us make that a reality.

Battery

Battery life was decent but not exceptional. Oculus touts battery life at 2-3 hours but that all depend on how you use the device. If you have multiple gaming sessions back to back you might see the battery life on the shorter side. Also, if you plan on casting anything that will also take up more battery. Some have come up with accessories and hacks to improve battery life but they can be cumbersome. My suggestion would be to schedule a 45 minute period of usage but charge it in during the next period for use afterwards. The included USB-C cable charges fairly quickly so you won't be stuck waiting 2-3hrs for a full charge.

Sharing

Since we only have one device currently, what are we to do with the other students while it's in use? One way we're able to share the experience is through casting. The Oculus includes built-in Chromecast support however it is very much in beta still. Through the Oculus app you can cast what the person is seeing to your phone. It works pretty well with only minimal lag. I purchased a Chromecast Ultra to use with our flat panels here but after a day of testing realized it was not going to work. For some reason, the Chromecast will not accept a signal from the Quest. After over an hour on the phone with our networking vendor, it is not the result of any sort of network block or restriction. I am able to cast from my phone to the Chromecast without issue and also can cast from the Quest to my phone. I just cannot cast from the Quest to the Chromecast. My solution for now is to hook up my phone to an HDMI connection on the panel in order to get the signal on there.


If you're interested in taking screenshots or videos of your experiences, I'm happy to report that it is a very easy process. You can record video or take snapshots at any time by selecting the sharing tab inside the Oculus menu from the headset. There you can select either a screenshot or video. You have a few seconds to jump back into your app before a screenshot is taken. Since the Oculus is a Facebook owned company, Facebook sharing is natively available from within the headset. Facebook is blocked here, so I just hooked up the USB-C cable to my PC and Windows instantly picked up the headset. You have to put the headset back on for a second to allow permission for the PC to access the internal storage. Once you do, a media device appears in Windows in which you can browse the internal storage of the Quest. I was able to export all the screenshots and videos you've seen here via this method. If you do not have a USB-C capable device in your school, you can order this cable to connect it to a standard USB port.


Conclusion

Overall even with our limited testing, the Quest has been a huge hit here. Teachers have been getting competitive with Beat Saber scores and we've had a few meetings about potential lessons to introduce the Quest. Some sharing and purchasing issues aside, I think this device has huge upsides in the classroom and costs considerably less than devices such as the ZSpace. If you're administration is open to the idea I would not hesitate to recommend the Quest for your classroom!


Wednesday, March 27, 2019

A Minecraft Revolution and Community Development

In the Spring of 2018, I met with our fifth grade teachers to discuss various lessons they were working on. When they mentioned the American Revolution, I thought that would be perfect for use in Minecraft Education Edition. They liked the idea and we spent some time spinning ideas on how to best craft a project around their lesson. One of the ideas that I threw out was to create a virtual museum dedicated to the American Revolution. Students would be grouped in pairs of two and given a 10x10 area to depict a visual representation of a specific event in the revolution. Due to many end of the year activities and testing (yay) we did not get to the project before school let out for the summer. However, since these teachers had a looping class they would then have the same students in sixth grade. We were able to pick back up with the project in October once things calmed down from the start of the year.

The first step in creating this project was to teach the students about the revolution. Once the teachers felt students were ready, then we would start the Minecraft portion. Students had to begin their research before even stepping foot in the computer lab and working within Minecraft. This took some time, and students did not start the Minecraft portion until late October. The two teachers then came to the lab with their students on different days. The Minecraft world was started by me where I carved out areas for the students to work in. I enlisted the help of my 7 year-old son at home to help me begin the template. We created 10x10 squares that were connected via a walkway which wove its way through the 18 different plots. Mrs. Evans and Mr. Cerullo broke up their student groups into pre-revolutionary and revolutionary events. The museum tour began in an atrium which led to the pre-revolutionary wing.


Students worked off and on for a month to create a fully immersive and interactive museum that anyone can walk through. Students were also able to easily some of their errors when walking through the museum and reading the many signs/information boards throughout the museum. Some students even got extra creative during the process. One of our students designed a horizontal redstone firework launcher to mimic the British troops firing on the colonists during the Boston Massacre. Below are some of the finished scenes in our museum.


At the same time this project was going on, I was also working with second grade teachers on a community project. These students were learning about what makes up a community and jobs within the community. I again started them off with a template with building plots for the groups of students.


These students researched the various jobs within a town and which services are essential for a community. Groups designed schools, firehouses, police stations, etc within their own community. For this project, each class was responsible for their own Minecraft community world. All structures in the world were completely student designed and placed. The teachers working on this project were amazed with the results and how well their students excelled with this project.


Thursday, June 8, 2017

The Design Process: From Blueprints to Finished Product

I was fortunate enough to attend a Minecraft: Education Edition training seminar this past October. I spent three days learning the ins and outs of teaching educators the best ways to implement Minecraft in their classroom. It was during this training that I had an idea. Our school had just passed a referendum that renovate our school. This would be the first major renovation to our school in almost 25 years. This renovation includes a new parking lot, new playground, new main entrance, Main Office, Media Center, Computer Lab, and the addition of a STEAM Lab. I thought it would be amazing to put our students to work re-creating our school in Minecraft.

I have seen many videos on Youtube about students creating their current school in Minecraft. I wanted to take it a step further and have our students create what our school will look like once the renovation of our school is complete. I
partnered up with a Trish Evans, a teacher 6th grade teacher in our school, and we got to work.


At first, I wasn't sure just what I was allowed to share. Students worked off drawings I had of the building that were projected onto a board at the front of the room. It was difficult to keep it from being seen at the door by other teachers so that didn't last very long. One of the difficulties we faced early on was that I only had measurements from the architect for sections of the building that were being renovated. This meant that for two of the three floors of our interior and 90% of the exterior had to be measured manually. We sent students out in small groups for months to measure every inch of the school. Whenever someone asked the students would just respond that they were working on a geometry project. Luckily after about a month, I met with the architects and explained what we were doing. We were able to then use the plans and share them in class with students. This made (the renovated spaces) MUCH easier to work on.


If you aren't familiar with Minecraft, each block in game is 1 meter cubed. This meant that every single measurement we had of the school would need to be converted from imperial to metric. This led to a number of challenges that I'll get into later. Before students were able to even get in-game, they had to work on their section converting the measurements. All measurements were checked and re-checked by Mrs. Evans, their teacher.


Challenges


  1. One of the first challenges that students faced was converting all the measurements from Imperial to Metric. As mentioned before all blocks in the game are 1 m3. Once students learned that 1 meter equals approximately 3.28 feet, they got to work. This conversion then introduced a new challenge.
  2. Conversions didn’t always line up correctly within the real world to Minecraft. There were many instances where an office or other part of the building would look MUCH smaller in Minecraft than in the real world due to the differences in measurements. There were a few instances where we took artistic license in order to make a space look more like its real world counterpart. These instances were very few though. This balance between the “look” of the real world in conjunction with the measurements within the game led to our next big challenge.
  3. We decided to start with the exterior of the building, however we quickly learned that in order to keep the measurements as close in Minecraft as they were in the real world we decided the interior wouldn’t fit. If the measurements wound up being a few inches or even a foot smaller/larger in game than they were in the real world it was ok. When looking at a small section of the building, a few feet or inches wouldn’t visually throw things off too much. However, when you expand that small section to the entirety of the building then those individual instances of measurement inconsistencies started to add up. What I have seen others do for something like this is to scale up. Things in the game would be much larger but taken as a whole everything looked normal. “You” the character are 2m in height or just over 6.5’ tall. When you scale things up, it’d look like walking around the giant's house in ‘Jack and the Beanstalk’ but overall the scale was proportionate. For our project we wanted everything to be as 1:1 as possible. We decided to do TWO buildings. One of the exterior, and one of the interior. These two buildings are contained within the same world, but in different places. This led to another challenge.
  4. How would a person taking a tour of the school walk from the outside to the inside? Fortunately for us the answer finally came on 5/22. Just two days before we were set to unveil this massive project to our school. The latest update to Minecraft: EE allowed the use of command blocks. Through command blocks, I was able to script a way that once you set foot on a certain block you would instantly be teleported to the other section of the building. It was as seamless a transition as we could have hoped.
  5. The other major challenge we faced was keeping the secret of the project. We really wanted this project to blow people away so we kept the secret of what we were working on for 6 months! Only three staff members in our building knew what we were doing. Myself, Mrs. Evans (the teacher of the class doing the project), and our building supervisor. Having him on board early was extremely helpful. He was able to get us measurements that weren’t on the blueprints such as heights of ceilings that would have been too dangerous for students to measure. Our own administrators including our Principal and Superintendent had no idea until we showed the entire school. I commend the students for being able to keep a secret like this from their own peers for so long. Minecraft: EE works only on Windows 10 or MacOS 10.11+ devices. Our school is a Google Suite for Education school, so students have Chromebooks. This led to us having to work entirely on this project in our Mac computer lab. Since we were using the computer lab, Mrs. Evans had to book a LOT of time in the lab which could have raised many suspicions. Lucky for her she decided to not only work on this project but another history project that she decided to utilize Minecraft for. When anyone walked into the lab, students had to flip Minecraft over to a different world and hide architectural blueprints. Unfortunately interruptions like this led to a few delays.
  6. Each session we worked, I would export the Minecraft world in order to have a running list of backups. So if there were ever issues we could roll back to the prior day and start again without too much loss of work. However, two days before the project was to be finished students worked for two hours finishing a large portion of the exterior and I thought I had saved it, but unfortunately did not. When I exported the world and started to work on the teleportation system, I loaded the wrong world and overwrote what had been done earlier that day. I felt horrible, but the students gave me a good ribbing for it.


Conclusion


I couldn't be prouder for what our students accomplished. Some of them had never used Minecraft before! What they were able to build, and more importantly accurately depict was nothing short of amazing. I had students wanting to stay before school, during lunch, and during recess to keep working. I would also like to thank Mrs. Evans for allowing her class to even attempt this project. Once I asked for volunteers, she was the first to raise her hand. The amount of planning she put in was astounding. Below is our finished product, and also some side by side comparison shots.


Wednesday, December 14, 2016

Christmas Traditions through Skype

Last year, I had the idea of having our school do a Christmas card exchange via Skype with other classes around the world. Unfortunately, I started the program too close to Christmas and it was not successful. This year, I started the registrations in late October. I was blown away by the response to my lesson that was posted on the Microsoft Educator Community. I had almost 100 classes register to participate from all over the world!

Since I had more time to develop the lesson, I included a more rounded experience for all. What started as a project for our students grew too large from such an overwhelming response, that I opened it up to other schools in the US. I created a form that allowed me to pair up classes in similar grades (one from the US and the partner from a non-US school). Classes were tasked with creating physical Christmas cards and then sent to their partner school. Once the classes received the cards, they would have a Skype call to discuss what Christmas traditions they have in their respective countries. I had no idea what to expect from this project but thought it worthwhile for our students (and subsequently) and other students to learn about how the rest of the world celebrates Christmas or even another end of the year holiday. Below are some of the wonderful social media reactions from some of our participants.

I am delighted that not only did students learn about holiday traditions but some have formed long term partnerships due to this lesson. Please follow the hashtag #skypetraditions to see more exchanges with students.


A video posted by Tuckerton Elementary School (@tes_nj) on

A video posted by Tuckerton Elementary School (@tes_nj) on

Monday, June 13, 2016

RIP iPad 2 and 3

The WWDC just wrapped and the one topic I was interested in most to see was the unveiling of iOS 10. I was not so much interested in what features would be added (and there are a few good ones), but more so for what devices would be supported. I'm sure a lot of schools are in the same situation we are with regards to the iPad craze a few years ago. We jumped on board with these amazing learning devices but now those of us who were able to get in somewhat early will now be forced to refresh sooner than expected. Announced today, the iPad 2 and 3 are no longer supported. Obviously this doesn't mean our devices simply stop working but we will start to see app updates diminish as developers require iOS 10.

Photo courtesy of @jake_k


I had anticipated the iPad 2 being phased out for support but was shocked the 3rd generation iPad is also on the chopping block. This now eliminates all the iPads we have in our building. Understandable decision by Apple but costly for us.


Wednesday, June 8, 2016

The Littlest PC That Could

While I was over in London at the Bett conference, I started looking at the devices in the Microsoft booth. I noticed a very small device that was about half the thickness of a paperback book. It was running Windows 10. It's called the Kangaroo and is manufactured by InFocus. At first I thought it was running a stripped down version of Windows 10 but after using the device found it was running the full Windows 10 Home version. The same you'd find on any home desktop. I also noticed the insane price of just $99 USD for the device! So what are these devices, what can they do, and what do they come with? Full disclosure: The Kangaroo and Kangaroo Pro were purchased by my school. The Kangaraoo+ was supplied by Kangaroo for review. Now let's take a look.

Kangaroo (basic hardware)

The Kangaroo comes with 2GB RAM and 32GB EMMC internal storage. It also comes pre-loaded with Windows 10 Home edition. After booting up the device you'll find that with a little bloat you're left with 8-9 GB of free storage. If you plan on using this system as a kiosk or web only device you needn't worry about the internal storage. If you find you need more internal storage you can use one of the USB ports along with flash memory and set Windows to use that as the default save location. The hardware comes with a microSD card reader, microUSB port, 2 USB ports (1 2.0 and 1 3.0 port), HDMI port, as well as a fingerprint reader. We had no use for the fingerprint reader or the microSD port so I have not tested their functionality. Lastly, the unit includes 802.11AC wireless and Bluetooth 4.0 connectivity.

Kangaroo also includes an interesting feature that allows you to control the PC from your iPad. You must download the OSLinx app from the app store then connect the iPad to the Kangaroo via the iPad's USB cable. You can either use tap to select or show the mouse cursor. I tested via USB on my iPad 3 and found the performance to be slow. I was able to open programs and display just as I would on a PC albeit slower. The app is free but if you want wifi capabilities or bluetooth keyboard support you'll need to do an in-app purchase of $3.99 for each feature. I find that the free app Teamviewer does a much better job and also performs much smoother than OSLinx.

Windows 10 on my iPad!


At our school I decided to use the base unit as part of our staff check-in system. The Kangaroo was set up along with a USB barcode reader to scan staff badges as they enter or exit the building. Since our system is web based, I only needed a browser and nothing else. This system was perfect for this task and the cost was very affordable to allow us to do it. We did not need to spend a few hundred dollars on a tablet to do the same web-only work.


Pros

  • Low starting price
  • Windows 10 Home included
  • Fantastic for web-only work

Cons

  • 2 USB ports
  • Ports are too close together


Kangaroo+ (mid-range use)

The Kangaroo+ is a step up from the Kangaroo base model in terms of RAM and internal storage. Both have been doubled in this case you get 4GB of RAM and 64GB of internal storage. This bump in hardware specs was just enough to allow me to deploy this unit as a computer connected to our Promethean Board in the media center. Before placing this unit in the media center, we had to make a laptop available to hook to the mobile board. This meant utilizing someone else's machine and not allowing them to work. We usually have presentations, Skype sessions, or instruction in this space and the Kangaroo+ is plenty capable to do all of this with ease. I again ran into the issue of not enough USB ports however. We have a wireless kb/mouse combo and the USB cable for the Promethean board. This left us with no open ports if a presenter comes in with a presentation on a USB thumb drive. I used a non-powered USB hub to address this issue. Still, a side USB port would be a great option. One of the great features of the Kangaroo+ is how light weight it is. I was able to velcro the unit to the back of our Promethean board. This allowed me to keep the wires neat and also secure to the board without falling.

Our Kangaroo+ mounted on our mobile Promethean board.


Pros

  • Increased RAM (4GB)
  • Increased internal storage (64GB)
  • No pre-installed O/S allows for customization


Cons

  • If you want Windows you'll need to purchase a license adding another $120 to the price


Kangaroo Pro (power users)

The Kangaroo Pro addresses the lack of ports issue by adding a secondary dock that the hardware slips right into. This beefs up the usage considerably since it adds a network port, VGA connection, annother USB port, as well as a headphone jack. The main functionality of the dock is to allow the installation of a 2.5" HDD/SSD to really maximize your internal storage needs. The ability to add massive amounts of internal storage by way of an SSD or HDD allows this Kangaroo variant to be used nicely as a media center or a networked computer where a network user's documents are copied locally.

The main problem with the Kangaroo Pro, is that it includes the basic Kangaroo unit with the dock. This means you're back to having just 2GB RAM and 32GB of internal storage. The included dock allows you to easily address the internal storage issue, but the low amount of RAM is an issue that cannot be remedied. I would have liked to have seen the Kangaroo+ hardware included with the Pro dock.

Kangaroo inside the Pro dock. A 128GB SSD is installed inside the dock.

A better look at the added ports on the Kangaroo Pro dock.


Pros

  • Addition of a VGA, network, and USB port
  • Dock offers the ability to add a Solid State Drive
  • Windows 10 Home Included


Cons

  • The Kangaroo PC included is the base hardware not the upgraded + model.
  • Limited RAM

Even with some of the limitations, I would recommend these units for classroom or school usage. As I stated, I would like to see at least one more USB port on the base unit and the more robust Kangaroo+ hardware included with the Pro dock. I also encountered HDMI issues on each variant where the screen would not display but a reboot took care of that. These units are plenty powerful enough for light usage and work well within a classroom setting. The most amazing part of these units is their portability. There is a rechargeable battery included within the unit which makes this PC able to go anywhere. Kangaroo states a 4 hour battery life with casual usage. Things are just getting started for Kangaroo and I'm excited to see what they have planned for the future.

Monday, November 16, 2015

Social Skills with Maria

This past summer, I was fortunate enough to attend a pre-ISTE workshop with fellow Skype Master Teachers. Towards the end of this workshop, Mike Soskil (a SMT from Pennsylvania) and Dyane Smokorowski (a SMT from Kansas) introduced us to their friend Maria. When the Skype call was connected and I heard this little girl's voice, I was confused as to what was going on. Up on the screen a small animated girl waved hello to us. I just thought "oh wow" this is kind of neat. However, then she started to talk to us and call us by our names. I was VERY intrigued at this point. We started to talk about different topics as if we were talking to a real 1st grader. It was truly amazing. Then at the end of the call she had us all participating in a game of "Maria Says." Every person in the room (all adults) were laughing and enjoying themselves a lot!


Maria is from Wondergrove, and is a learning platform for preschoolers through second grade. The site includes hundreds of videos and lessons on social and life skills. Some of the topics covered include: Safety, health and science, nutrition, and school readiness. There are a lot more topics that are covered and each topic has videos with the characters from Wondergrove in them. These characters are around the same age as your students and really help put the content lessons on their level. These videos show the student characters interacting amongst each other in a fictional classroom setting.

Once I saw Maria in action, I had to get this tool for my own teachers. I immediately e-mailed my K-2 teachers to show them the link. I had a discussion with our principal about getting each teacher in those grades a subscription for the classroom. Once he saw the content of the videos, lesson plans available, offered in Spanish and English, plus each lesson is common core aligned it was a no-brainer.

My first demo of the product was at our back to school faculty meeting before the students came back. I gave little bits of information to Wondergrove about my staff. Once we started talking, she was picking out certain teachers and asking them about their summer with all the details I had supplied. They were surprised and also loved it. Our teachers have been using Wondergrove now for the last two months and it has been an overwhelming success. Students are engaged with the lessons and Maria will even Skype into the classroom to talk to the students! Recently I visited our preschool classroom to watch a Skype call with actual students for the first time. This call was right before Halloween and included safety tips.


The staff at Wondergrove have been a joy to work with and they truly care about their product and our feedback. It has been a great relationship so far and we look forward to using it for the rest of the school year. Our preschool teacher Mrs. Cirulli had this to say about it after the first few months, "My students love Maria and her friends!! The lessons are short and to the point but hold my students attention. This learning platform is one of the best!! I have been able to utilize the videos and Skype calls to effectively teach different content to my students in a manner that they enjoy and look forward to. My students enjoy listening to Maria and her friends explain different concepts about health, social rules, holidays etc."

If you'd like to test out the service sign up for their Thanksgiving lesson which includes a chat with Maria, plus a two week trial of the service.